Here’s How to Verify Smart Contracts on OP Stack, Step by Step
December 20, 2024
|
Nitesh Sharma

share
share
If you are building your L2/L3 on OP Stack, smart contract verification is a critical step in the entire development cycle. While there are multiple ways to do this, let’s learn to verify OP Stack smart contract using TraceHawk block explorer. We’ll discuss the step-by-step process of verifying smart contracts quickly within the explorer’s interface itself.
Before that, let’s first understand why it is important to verify smart contracts and also the various options available to do this.
In a standard setup, only smart contract deployer has access to the original code, and it cannot be accessed publicly until it’s verified. That’s where smart contract verification comes in. Let’s discuss some of the popular and viable ways to verify OP Stack smart contracts:
Contract verification via Block Explorer is quick & straightforward. Once verified, the smart contract or token contract’s code is available to everyone, which allows for the following:
Plus, verified smart contracts also allow users to interact with the contract’s data using direct methods like ‘Read’ and ‘Write.’
This section explains how to verify your OP Stack smart on a block explorer. Here, we have taken reference to Pandasea’s block explorer. Pandasea is a Layer2 OP Stack that uses a custom explorer powered by TraceHawk. Let’s begin..
1. Create & compile your OP Stack smart contract:
Of course, you’ll need a properly compiled OP Stack smart contract to verify it. If you already have the code, you can proceed with the verification. If not, let’s create one.
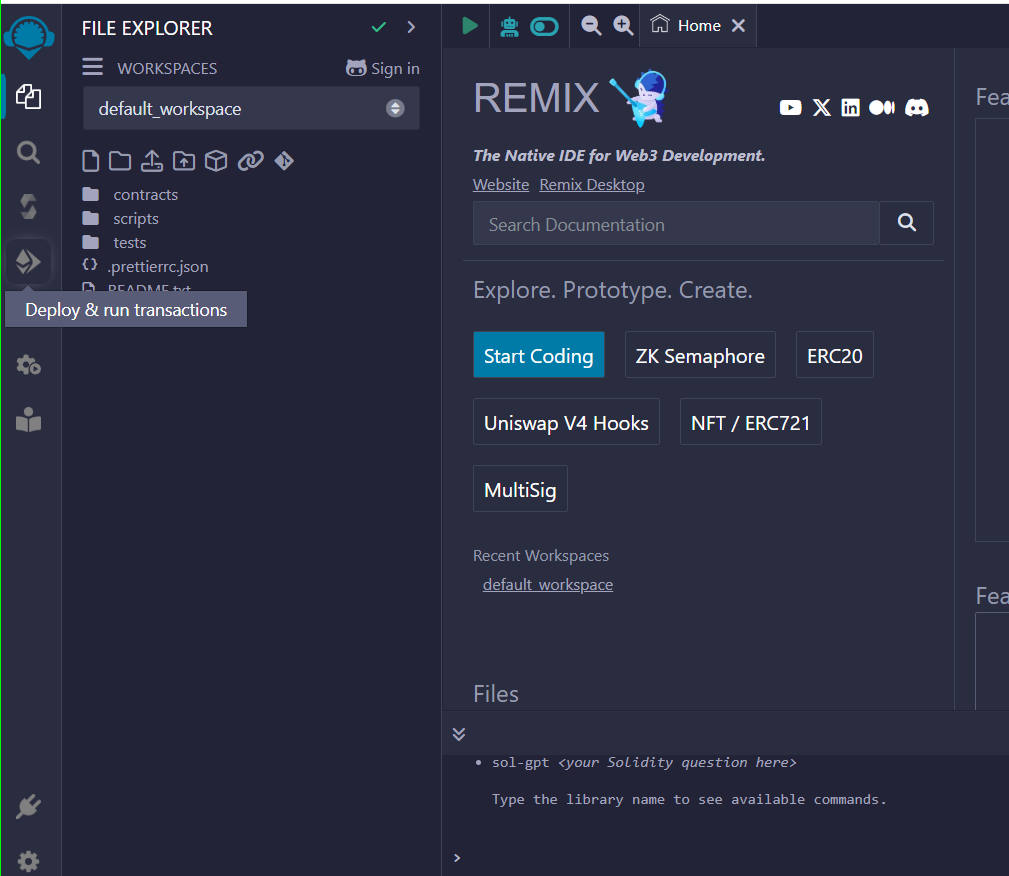
Step:1 Visit Remix IDE; the popular, open-source platform to create, debug, compile, and experiment with EVM-compatible smart contracts.
Step:2 Switch to Solidity environment by clicking on ‘Deploy & Run Transactions’ in the left panel.
Step:3 Select ‘Injected Provider- MetaMask’ from the Environment’s drop-down list. This will open your Metamask wallet, allowing you to connect your account to the Remix IDE and continue with smart contract deployment.
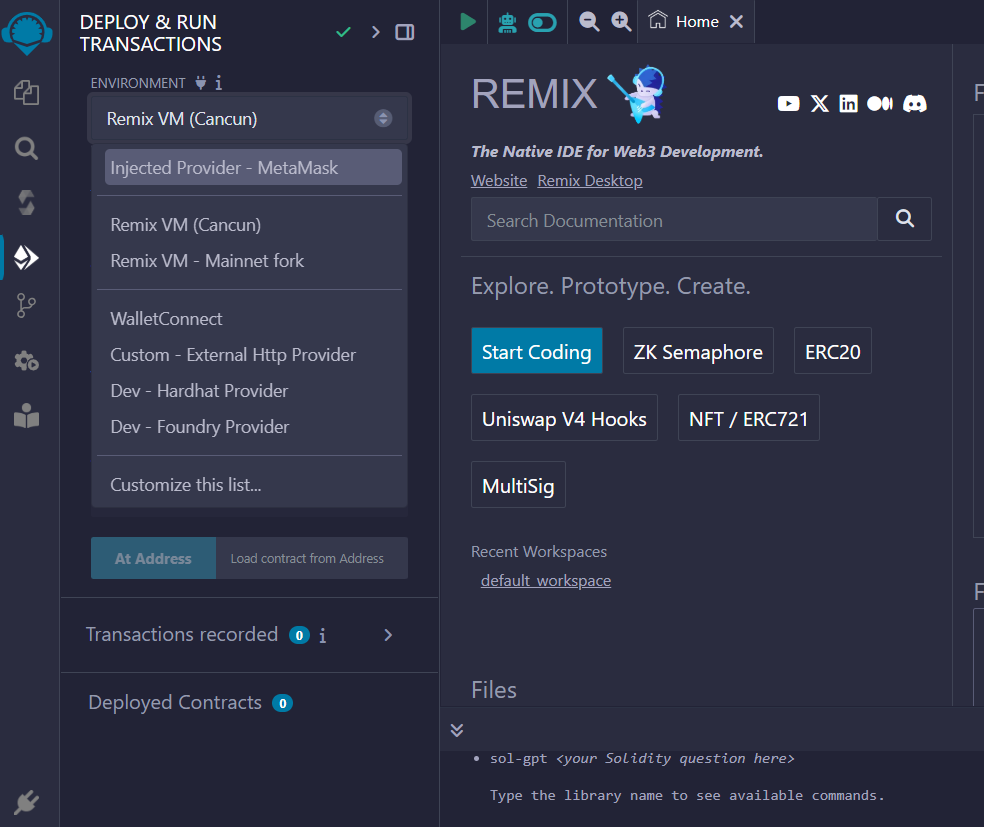
Once your Metamask account is connected, make sure it has enough funds to execute transactions. Here’s Pandasea’s testnet faucet to feed in tokens to your wallet.
Step:4 From the Remix IDE, click on the file explorer icon and create a new Solidity file. For example, we’ve created a ‘greeter.sol’ file for the purpose of this guide.
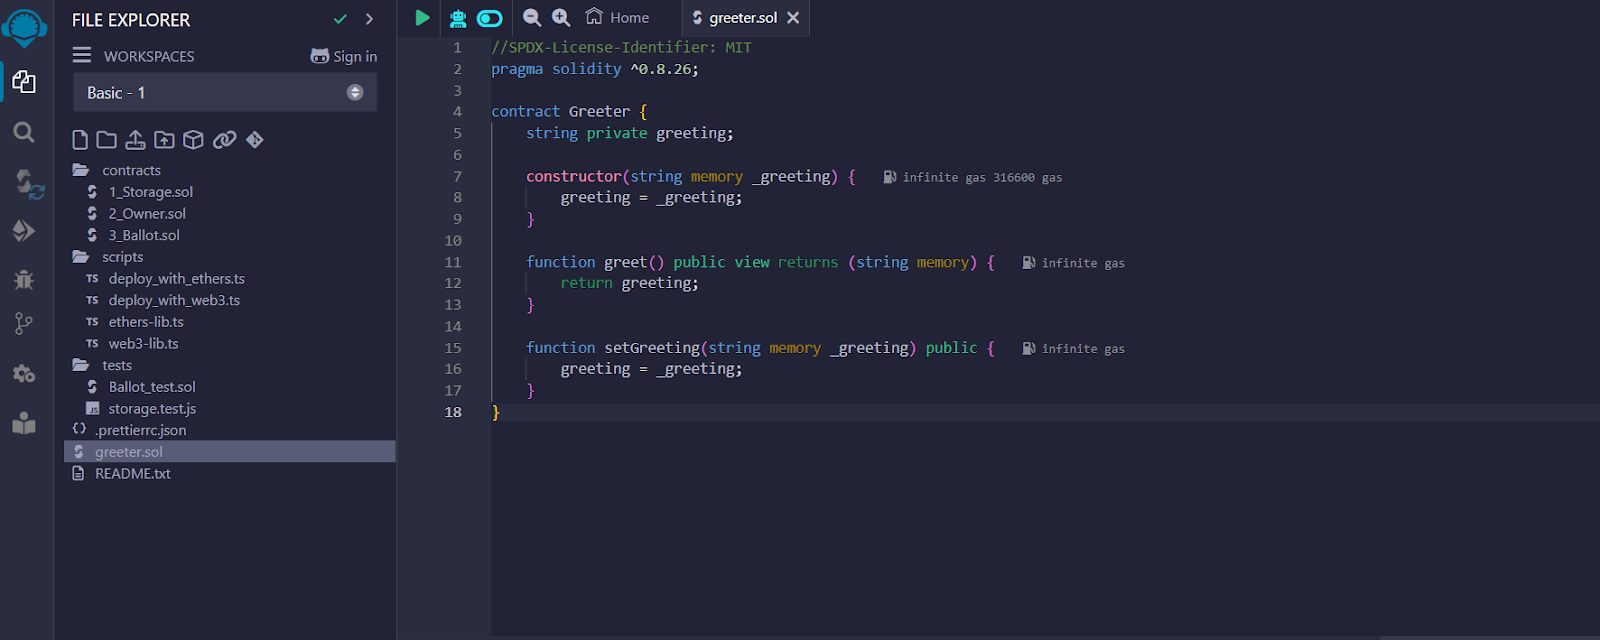
Also, we’ve written our smart contract code for the greeter.sol (as you can see in the above image). This Solidy code refers to a contract that will allow users to set and receive a personalized greeting message. Just FYI, this code is licensed under an open-source MIT license, and its version is ^0.8.26.
Step:5 Next step is to compile our smart contract. Click on ‘Solidity Compiler’ from the Ethereum’s logo and proceed with ‘Compile greeter.sol’.
Step:6 Let’s deploy our contract. Click on ‘Deploy’ and confirm transactions in your Metamask. Upon successful transaction, Remix IDE will provide all the information related to the contract, such as status, transaction hash, block, contract address, and more. Now, let’s verify the contract.
2. Verify OP Stack smart contract on Pandasea Explorer:
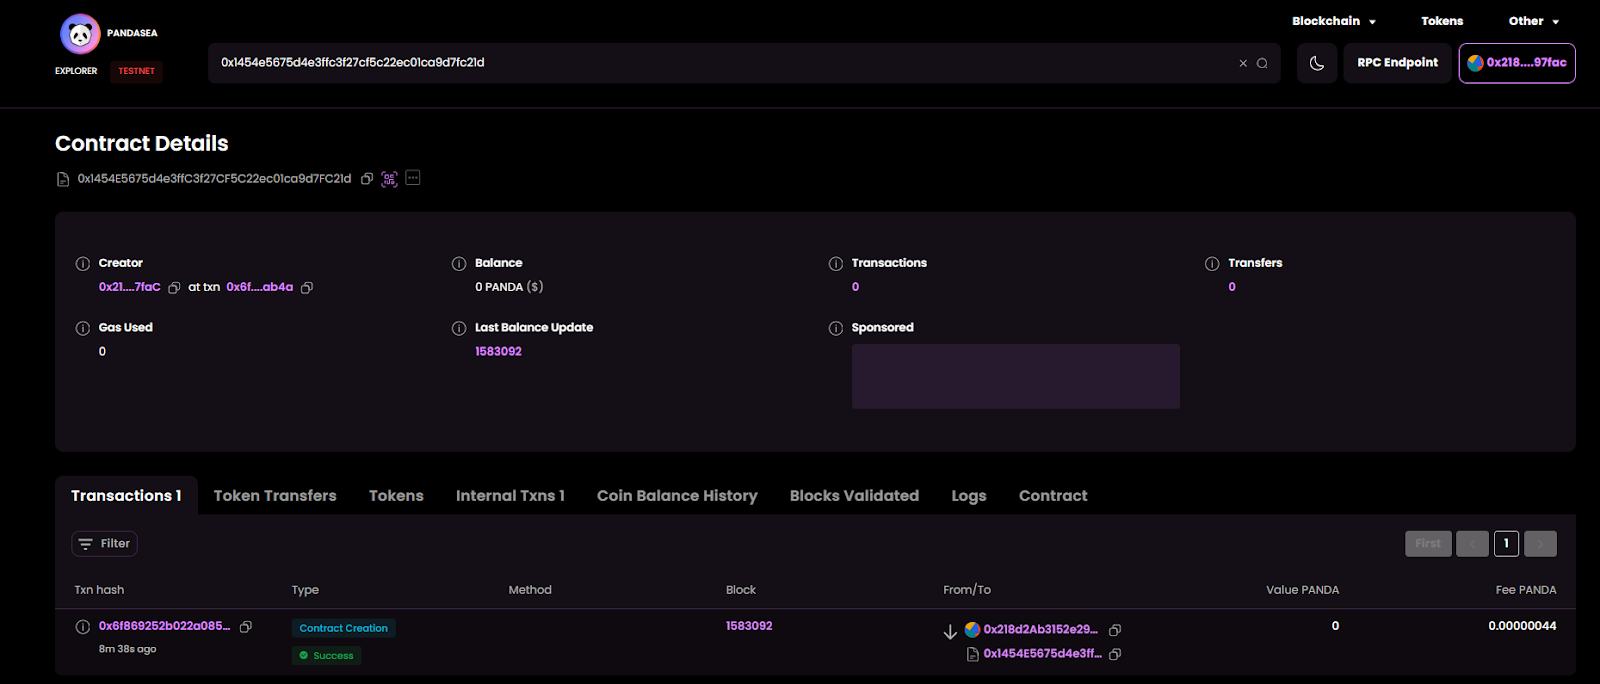
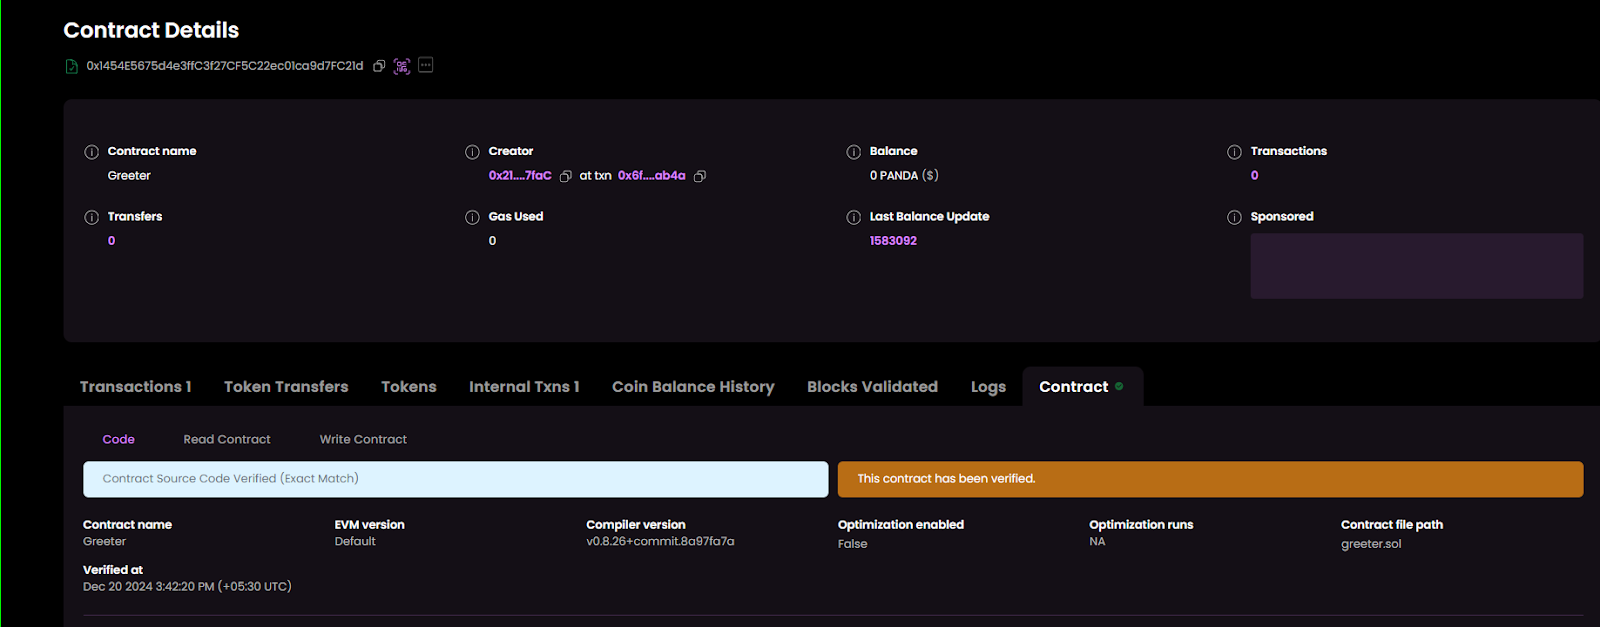
Step:1 Open Pandasea block explorer and connect your Metamask wallet. In the search bar, add your contact address. In our case, it is ‘0x1454e5675d4e3ffc3f27cf5c22ec01ca9d7fc21d’. Now, the explorer will open a comprehensive dashboard showing end-to-end details about the contract.
Step:2 Navigate to the ‘Other’ option in the top-left corner and click on ‘Verify Contract’. A new dashboard will open with 3 different fields– contract address, contract license, and the verification method.
We’ve added all the required details specific to ‘greeter.sol’ contract. Also, we are using the most-used verification method– Solidity (Standard JSON input). However, TraceHawk-powered Pandasea explorer supports 6 other methods, such as Solidity (Multi-part files), Vyper (Multi-part files), Vyper (standard JSON input), Solidity (Flatteneed source code), and Vyper (contract).
Finally, we’ve uploaded the JSON file that you again get fetched from the Remiz IDE. Go to artifacts—>build info→ address—> copy + save the input code under .json file extension.
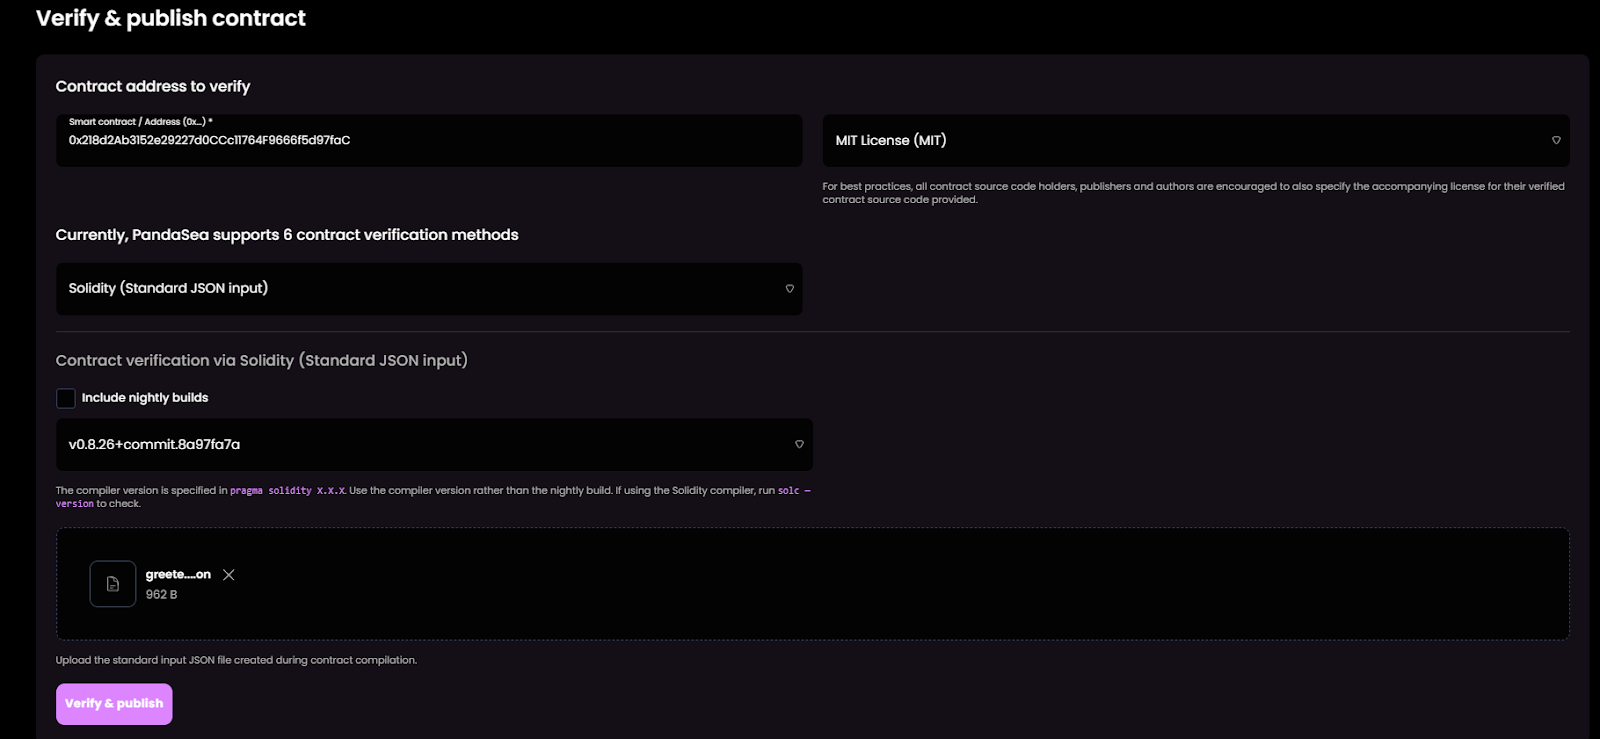
Step:3 Click ‘Verify & Publish,’ and your contract will be verified instantly. The instructions will appear like this:
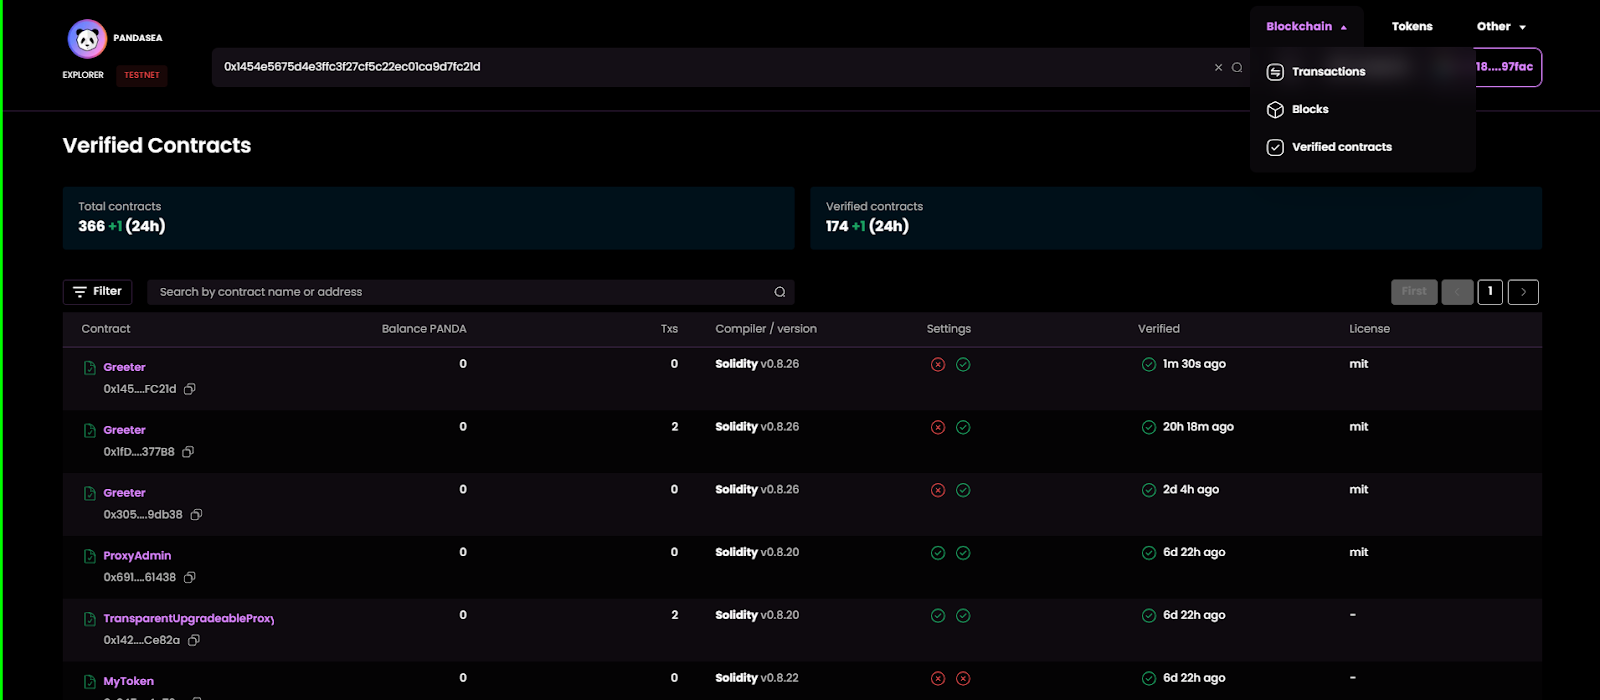
Step:4 To confirm if your OP Stack smart contract is verified successfully, click on the ‘Blockchain’ from the top-right corner and click on verified contract. As you can see, our smart contract; Greeter is in the verified contract’s list.
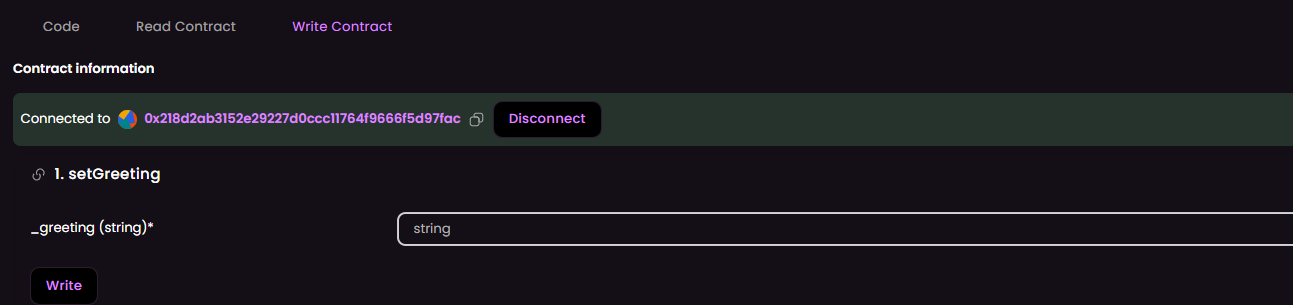
Step:5 Since our contract is verified and published for public use, anyone– be it a developer, researcher, or other data consumers can interact with the contract to;


Or,
3. Write contract:
Note: All the instructions in this guide are based on testnet. You can follow these same processes to verify OP Stack smart contracts on mainnet.
If you are launching or planning to launch an OP Stack block explorer, TraceHawk is ready to serve as your custom explorer. TraceHawk saves you significant cost and time with the option to customize TraceHawk and make it specific to your project rather than creating one from scratch. Also, TraceHawk offers a custom block explorer for Arbitrum Orbit, Polygon CDK, Tezos Smart Rollups, ZK Stack chains, and Parachains, and for all the leading appchains. For more information on TraceHawk, its features, customization, and offerings, connect with our experts. Also, you can try TraceHawk yourself and get a brief overview of TraceHawk’s comprehensive offerings.